The video is a summary and introduction of the full tutorial that you can read below.
Making the Pattern
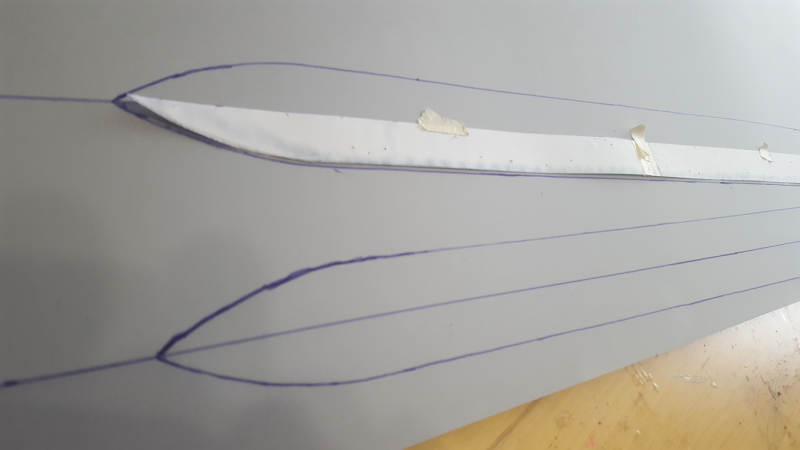
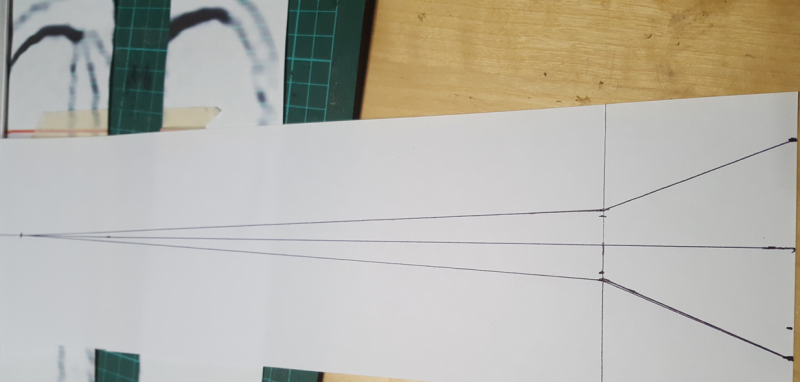
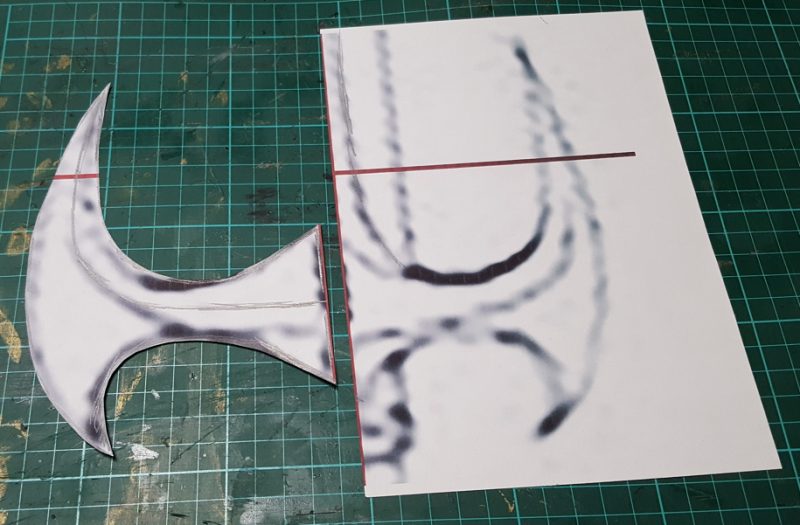
We started by using a settei from the anime (Slayers NEXT/TRY) as reference image. Based on the ratio between the length of the sword and the height of the character(178cm), our sword should be around 120cm and should fit both heights (Hoshi wears a pair of high platform shoes) nicely.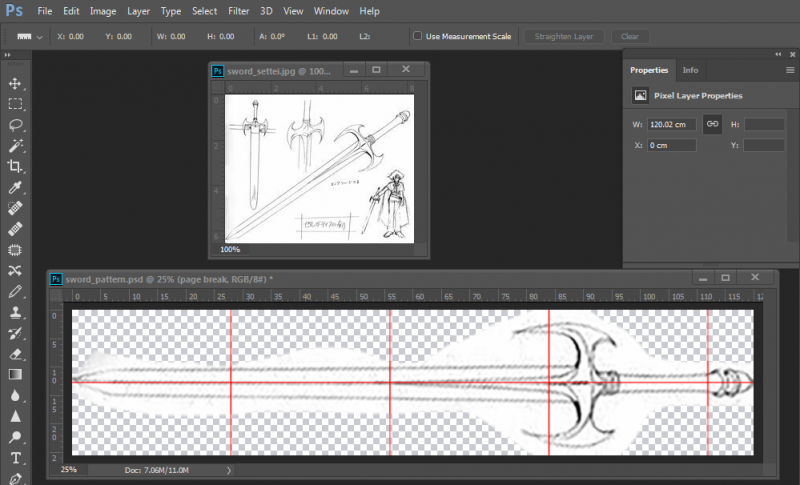 With Photoshop we cropped and straightened the sword, then scaled up the pattern to the right printing size. We also made it a bit slimmer as otherwise it would have turned out to be too massive. The red lines marks the center of the sword and the page separations; this will make it easier to align the pattern. The image was printed on several sheets, cut and taped together.
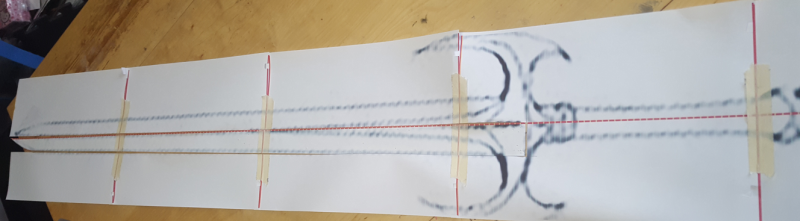
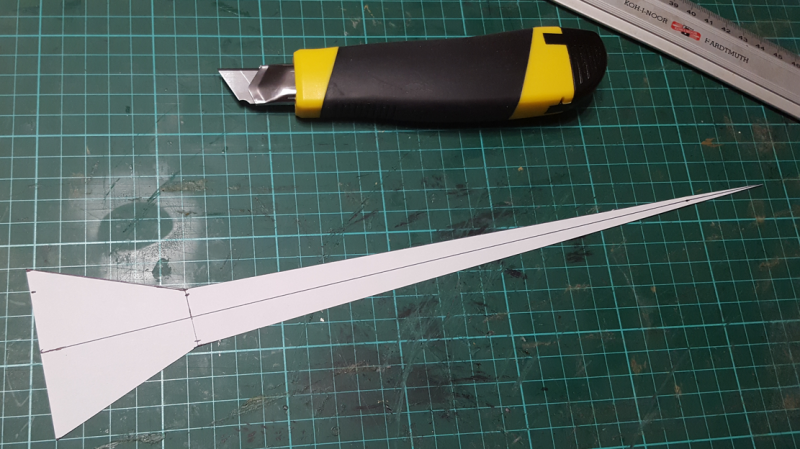
Half of the blade was cut out to be used as pattern.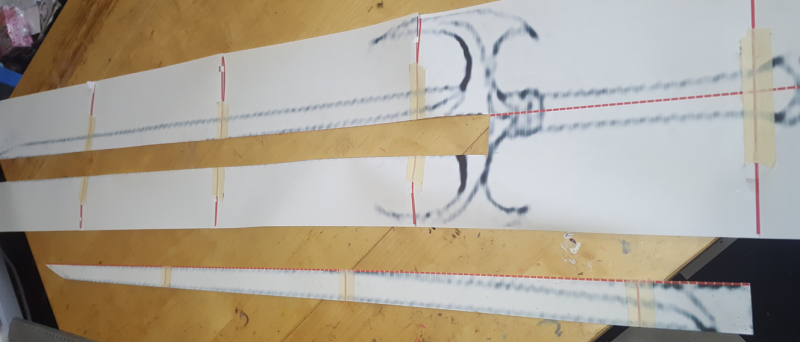
Shaping the Blade
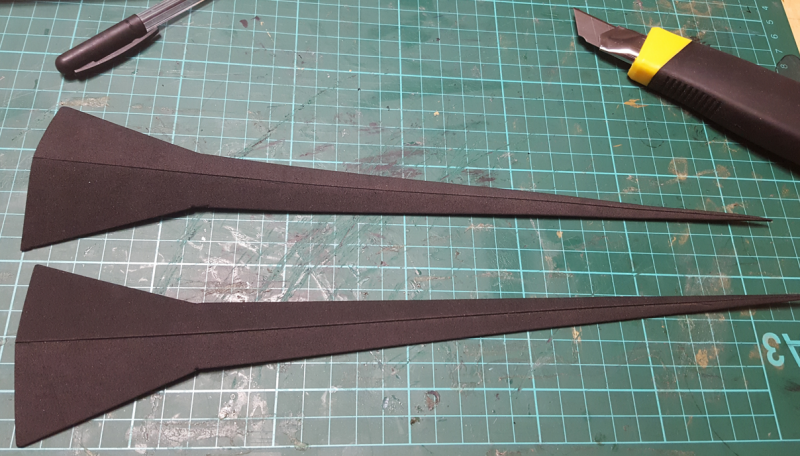
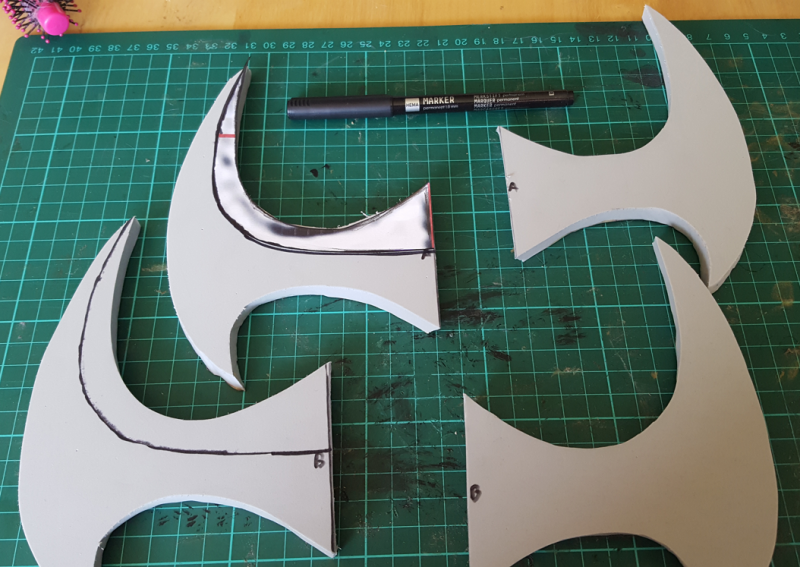
For the blade we used EVA foam 100kg density 5mm thick because it’s quite rigid and can be easily sculpted and sanded.
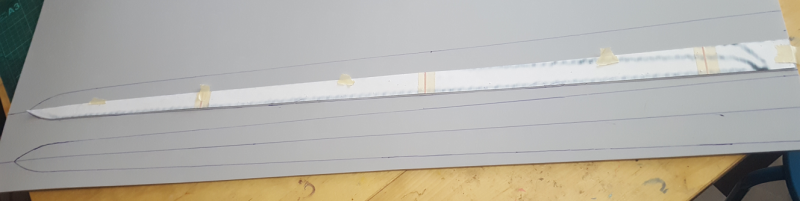
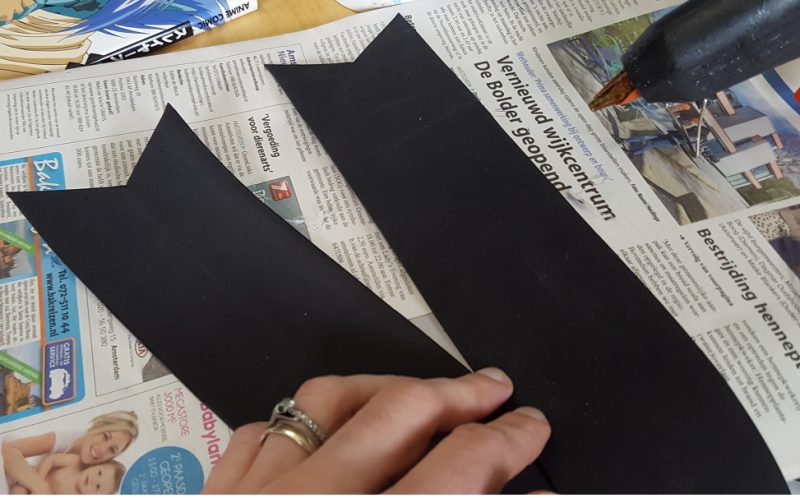
The pattern of the blade was traced 4 times on the foam in order to have 2 complete shapes, then cut with a precision knife (X-Acto like).
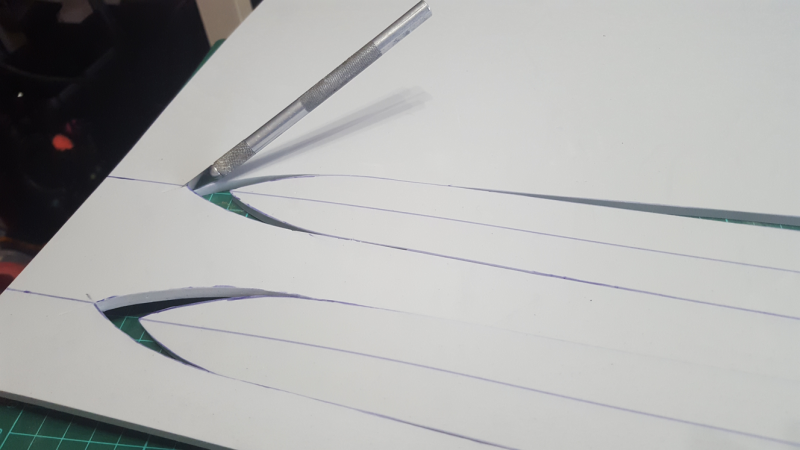

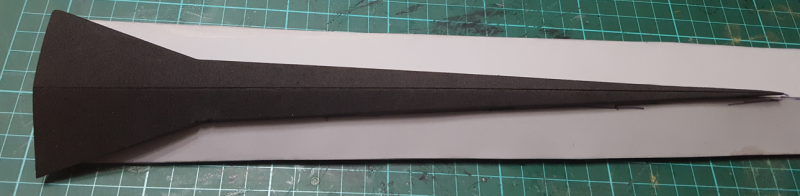
The edges of the pieces are then refined with a precision knife so that they can fit together in a diamond shape.
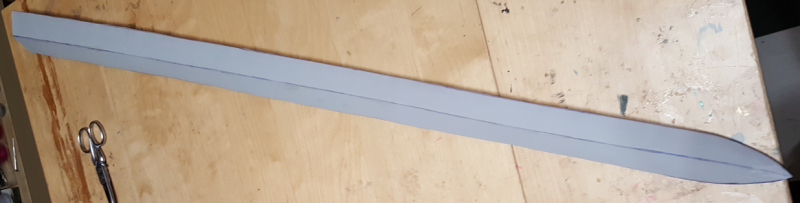
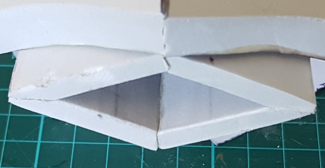
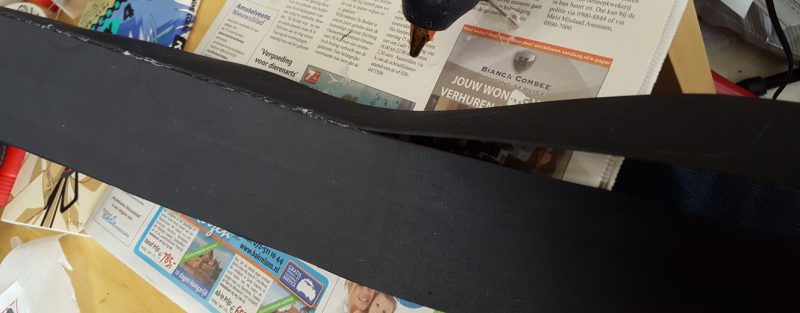
The pieces are the attached together with contact glue. The detail picture shows the section of the assembled blade.
For the relief at the base of the blade we draw a pattern based on the full scale print.
The pattern was cut twice on 2mm thick craft foam. We made an incision along the center so that the foam can bend with a sharp angle when attached to the blade with contact glue.
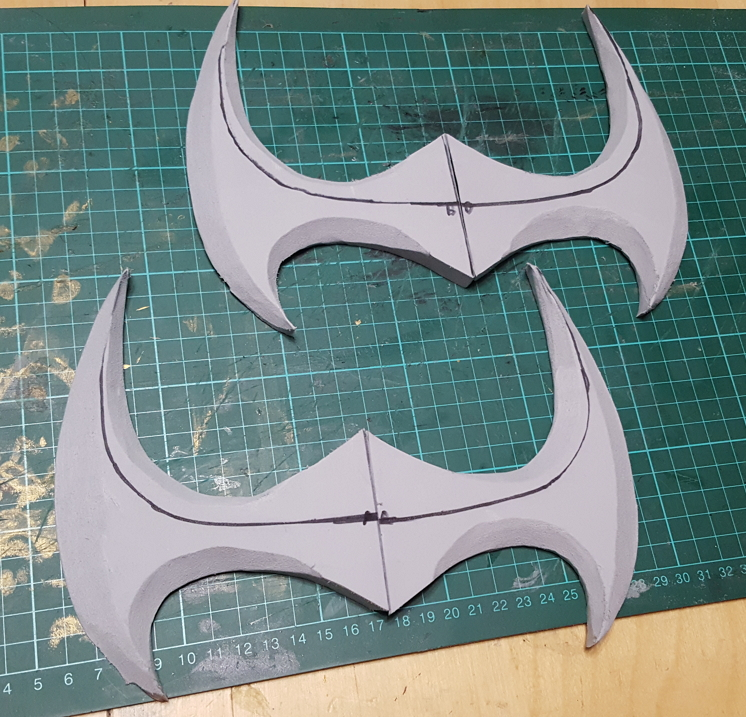
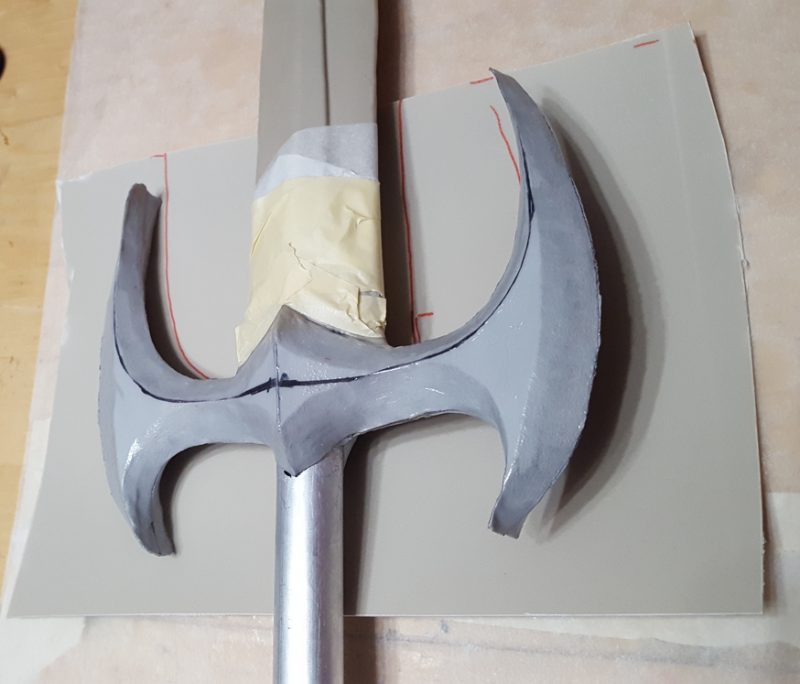
Sculpting the Guard
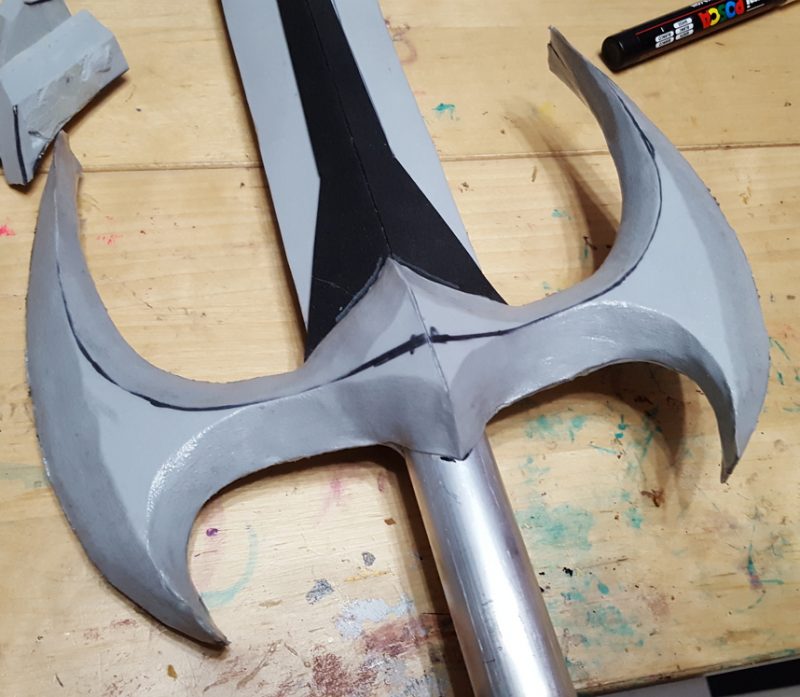
From the full scale print we cut out half of the guard to be used as pattern. The pattern of the guard was then traced 4 times on EVA foam 100kg density 10mm thick (in order to give a better 3 dimensional look when sculpted) and cut. The additional line will be used as reference for the ridge during the sculpting.

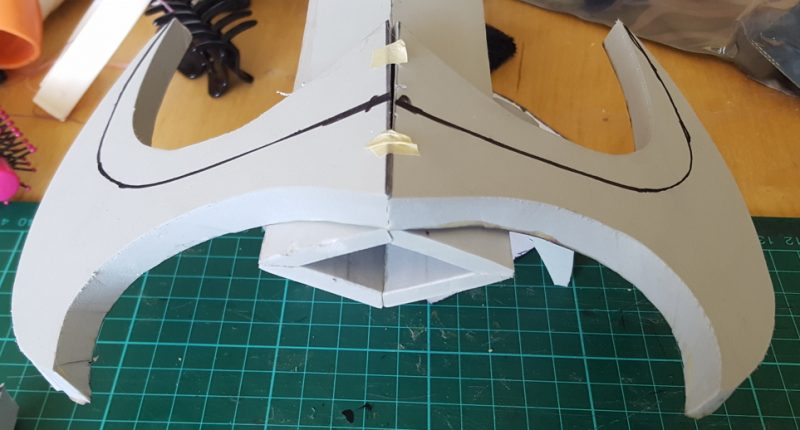
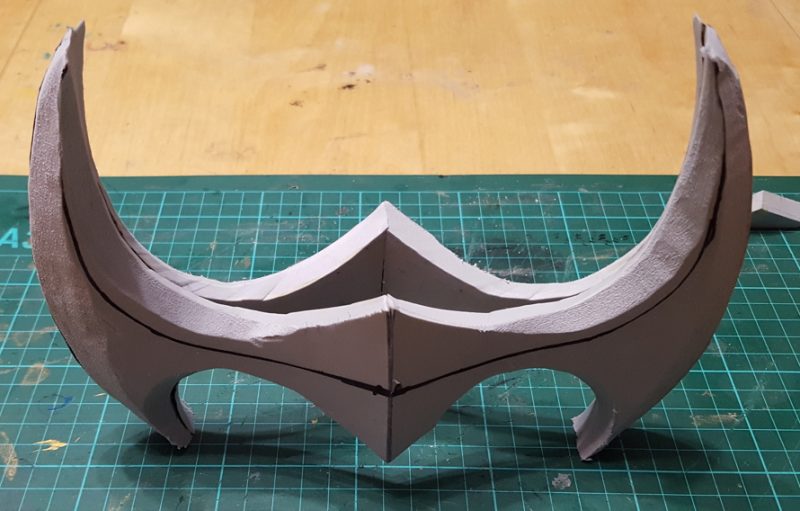
The border in the middle has been cut with an angle in order to match the shape of the blade.
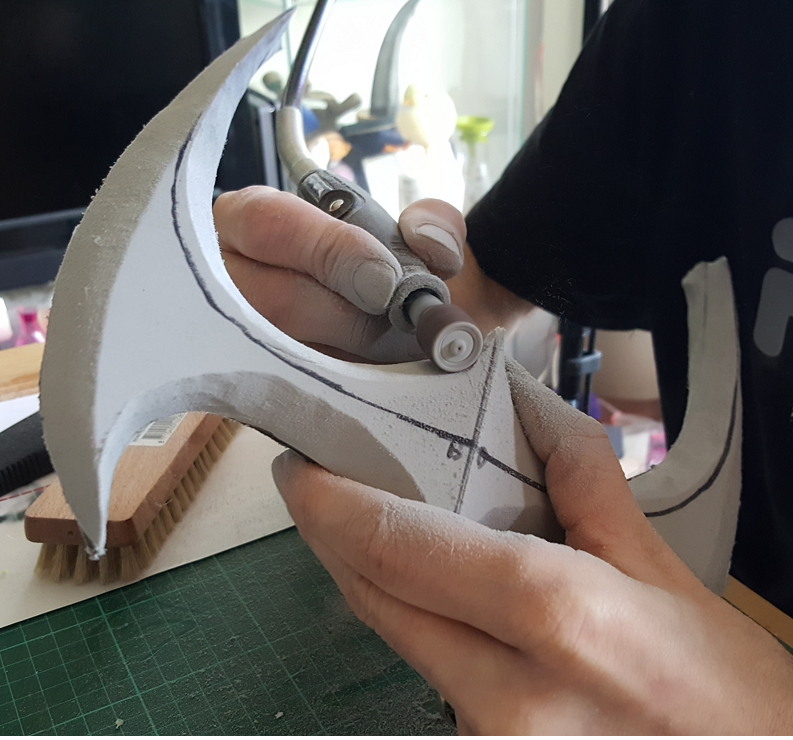
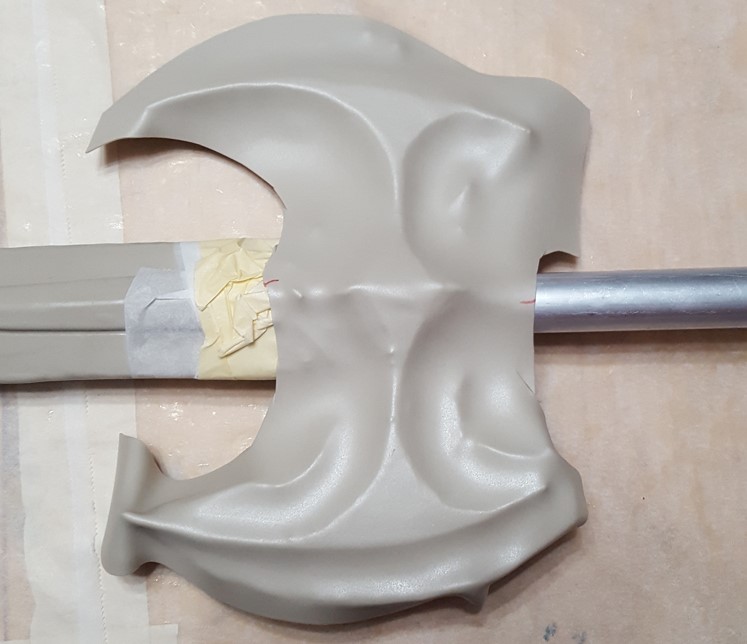
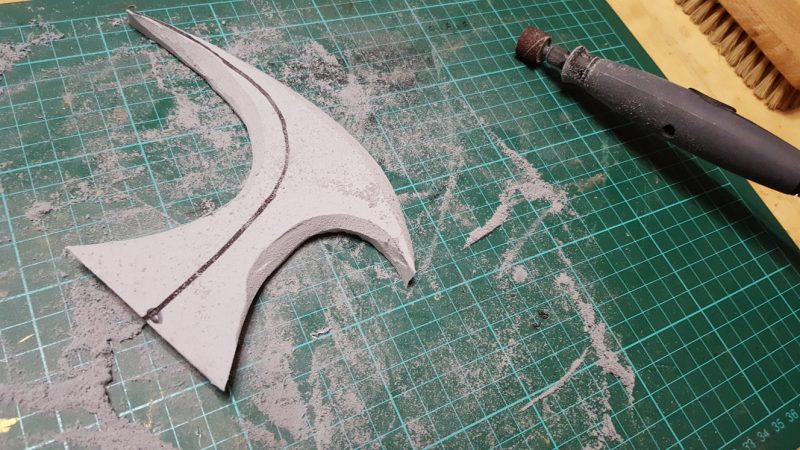 We started to roughly sculpt each piece using a Dremel with Flexible Shaft and a Sanding Band. Try to use the slow speed to have better control and remove the material in an uniform way. Note that when you move the tool in the same direction of the rotation you will get a smoother result (good for finishing and make the surface even), while moving on the opposite direction will remove more material (good for the initial sculpting). Use both ways wisely depending on the result you want to achieve.
We first glued together the 2 halves of each face with Contact Glue, then the 2 faces one on top of the other, making sure not to glue the center where the blade will fit in.
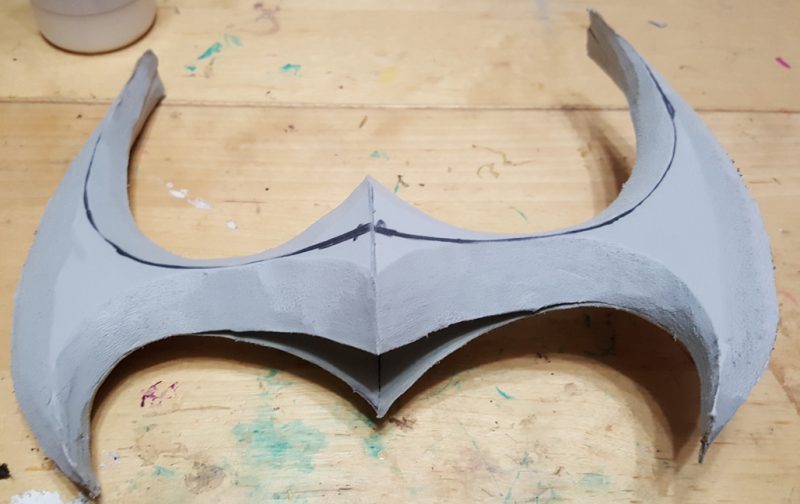
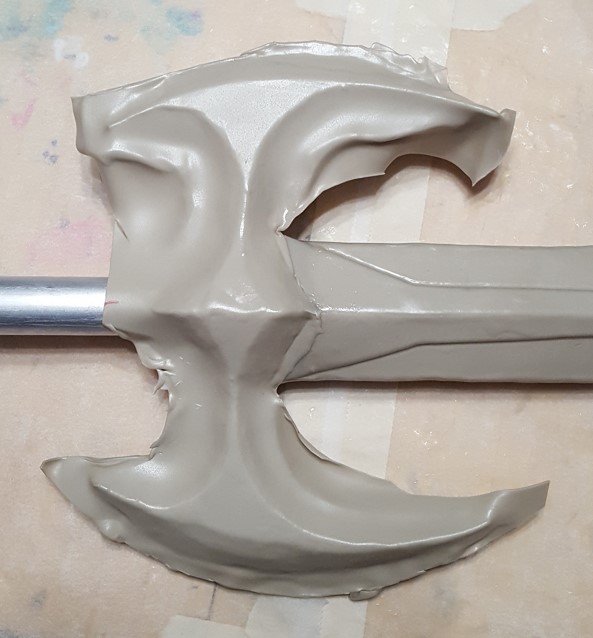
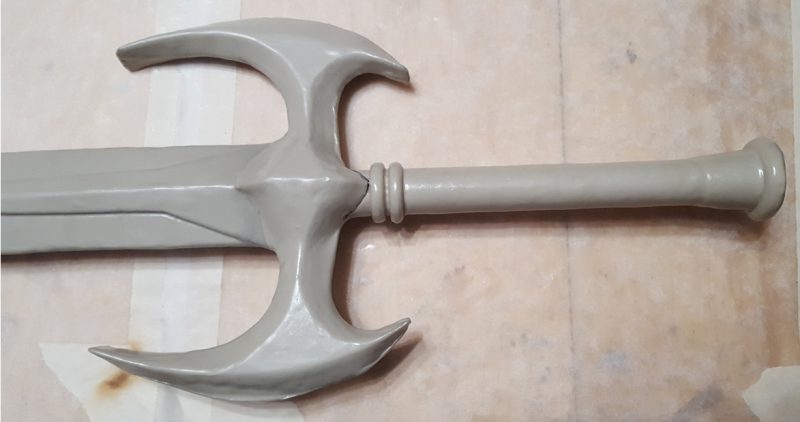
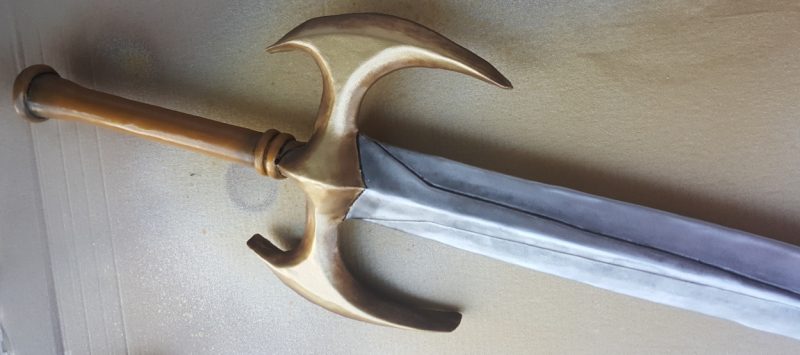
Then the final details of the Guard are sculpted on the assembled piece so that every side has a similar shape and they fit well together. You can see the final result on the right.
Making the Grip and Connecting it to the Blade
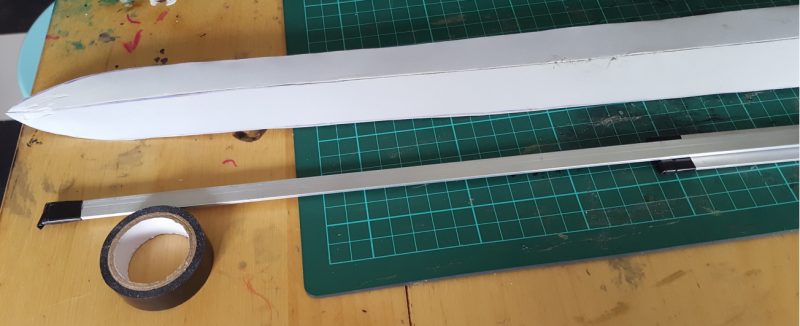 To support the blade and make it more rigid we used 2 aluminium flat profiles 20x2mm and 10x2mm stacked one on top of the other. Insulating tape has been put around the extremities to avoid them to puncture the foam with the corners.
 The 2 profiles were then taped together…
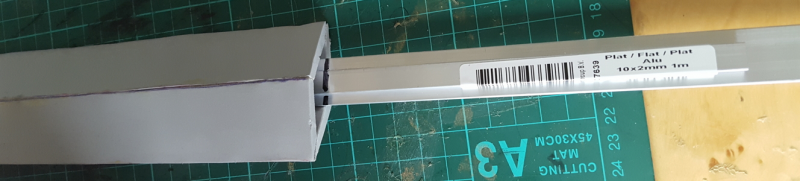 … and inserted in the cavity of the blade.
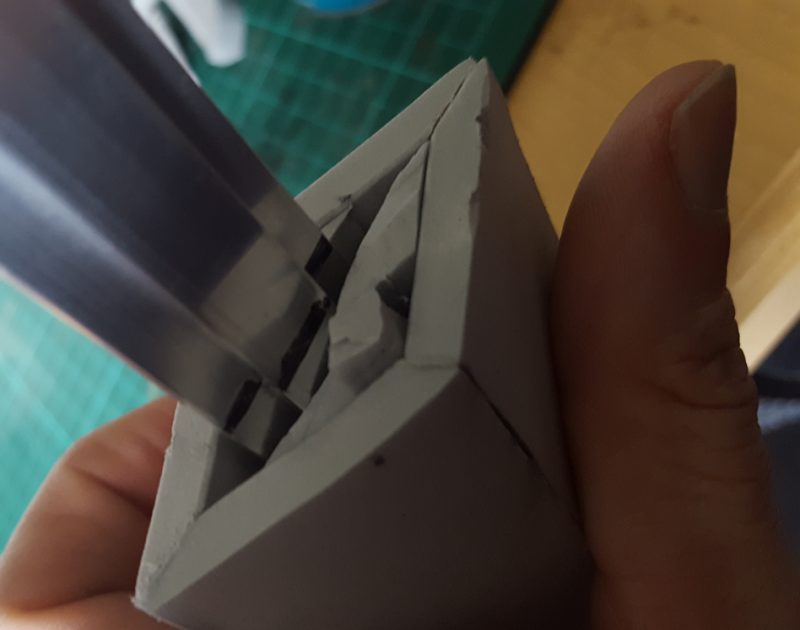
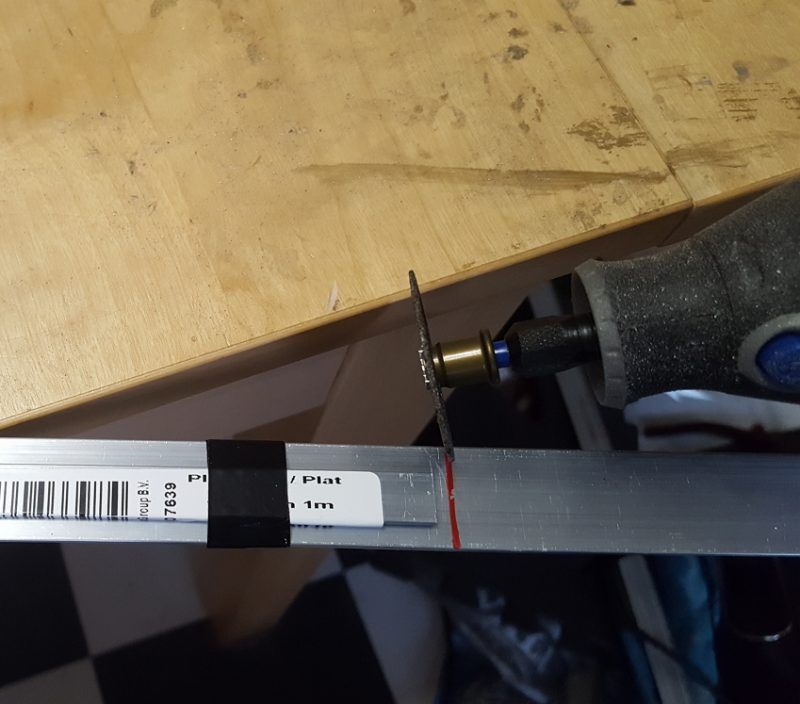
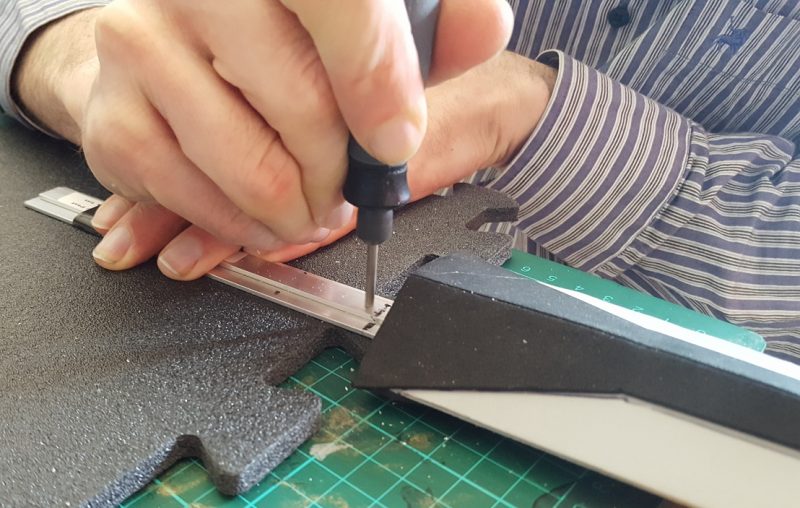
We used some wedges made of EVA foam scraps to keep the profiles centered. The profiles where then cut to the right length using a Dremel with metal cutting wheel.
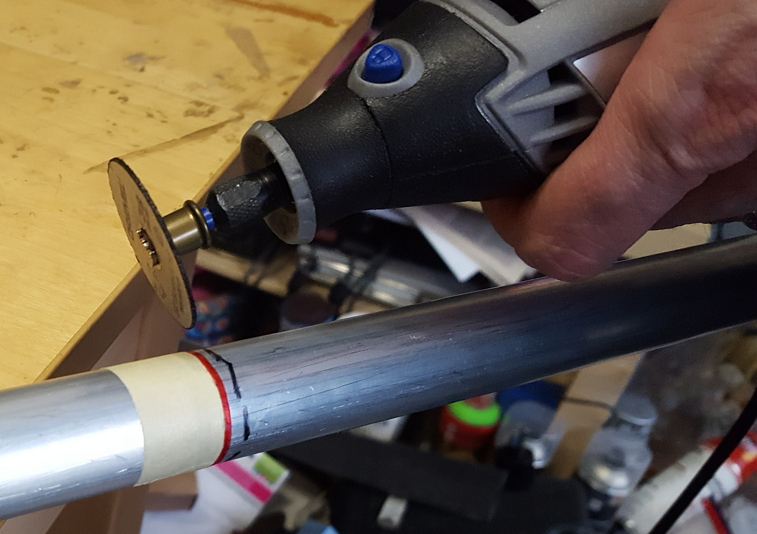
In the same way we cut a 28cm section from a 25mm aluminium pipe to be used as the Grip. Cutting left some rough edges that we finished with an Aluminum Oxide Grinding Stone.
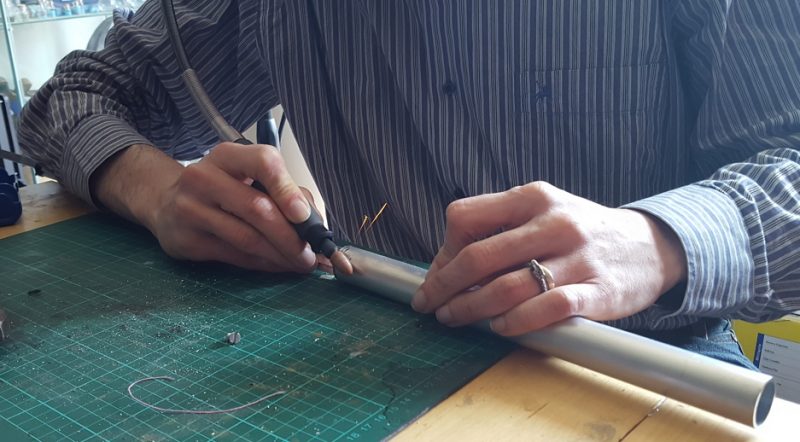
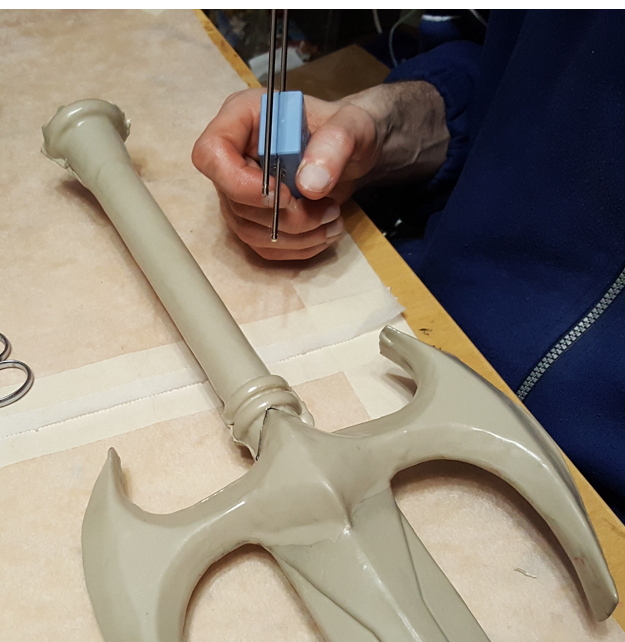
To fix the metal profiles to the grip we bore a hole through all of them and put a screw. The head of the screw was then removed and the remaining part protruding from the grip grinded (in the picture on the right you can still barely see where the screw is). Hot glue was then poured between the blade and the profiles to fix them in place.
Priming the Surfaces
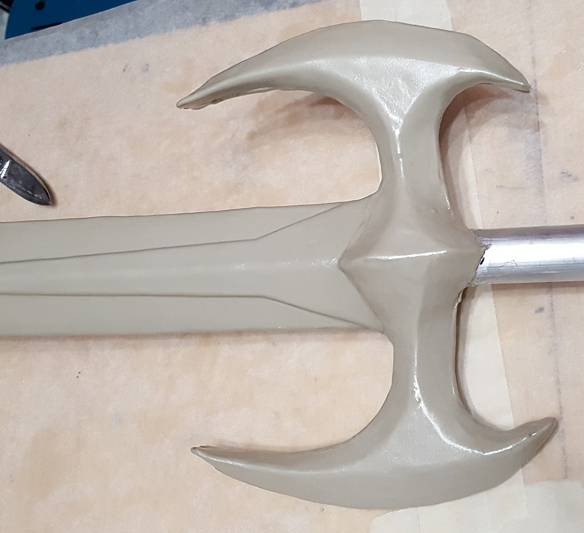
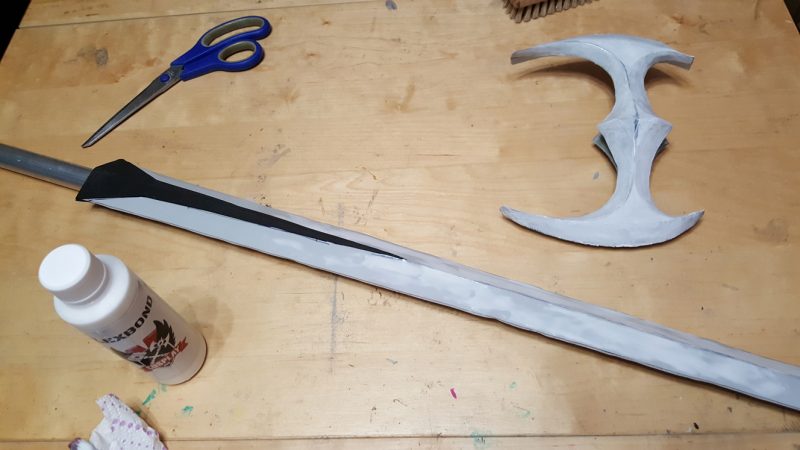 To cover the small gaps and imperfections left by the sanding, we gave 3 layers of Flexbond on the Eva foam, applying it with the finger. This left the surface very smooth.
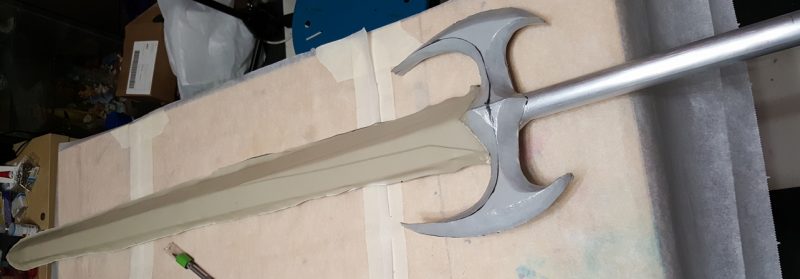
Attaching the Guard
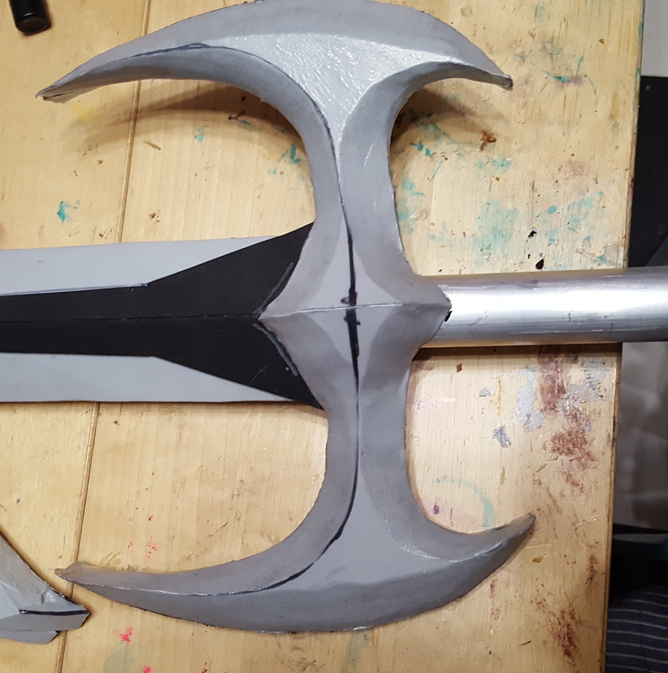
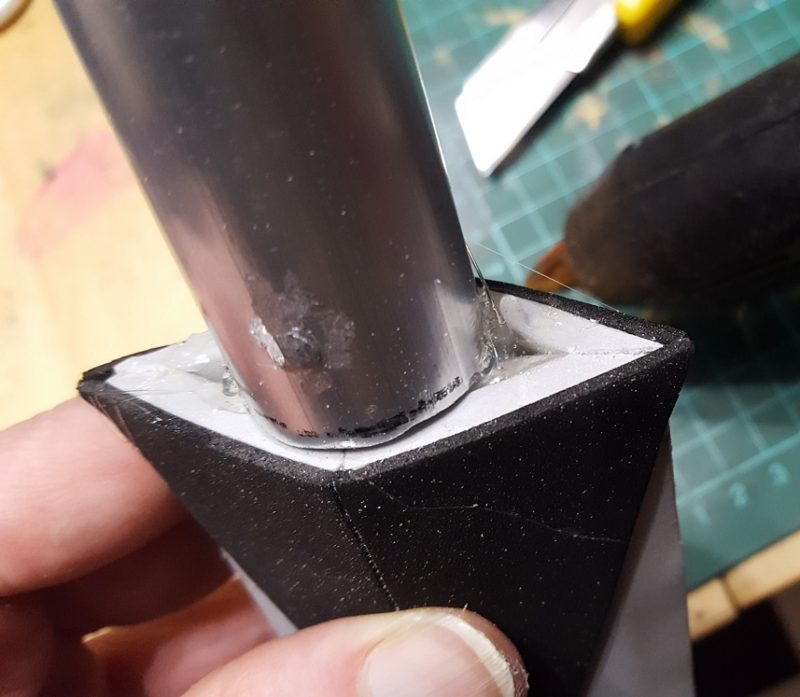
The blade has been slid inside the guard opening and fixed in place with contact glue. We made sure to press well together the pieces so that only a minimal gap remained.
Applying Thibra on the Blade and the Guard
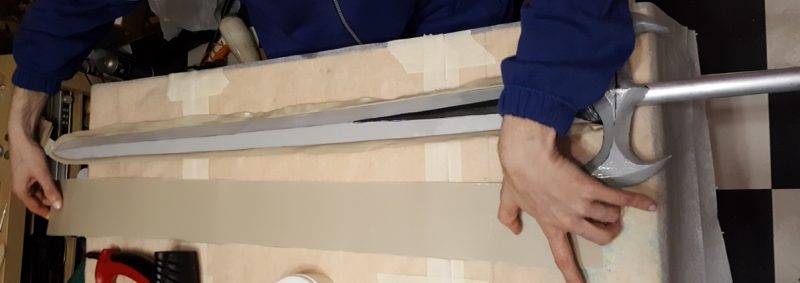
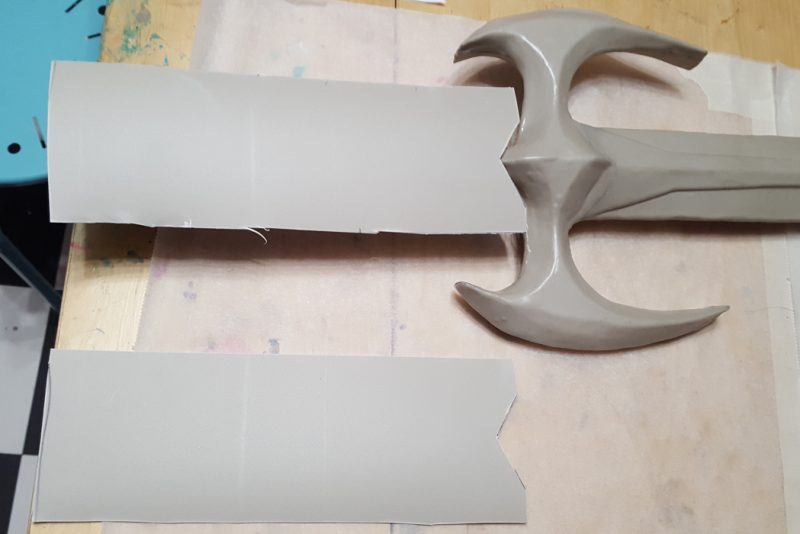
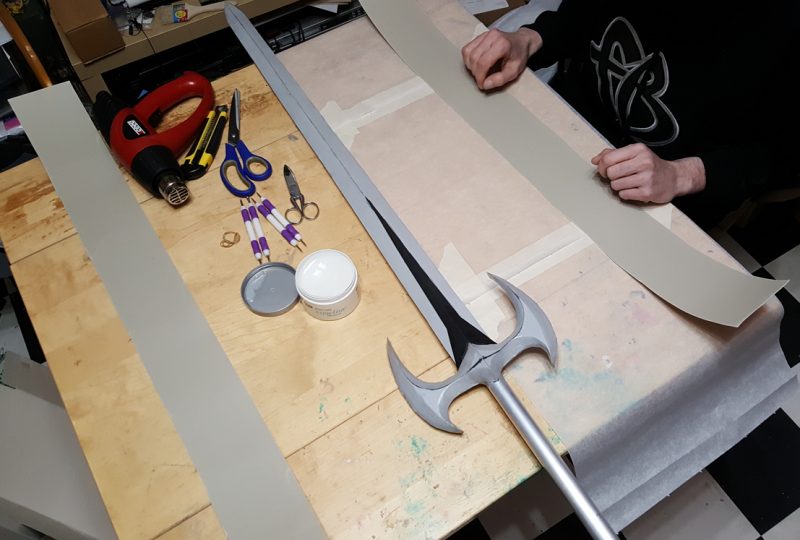 We first cut 2 pieces of Thibra to cover the blade.
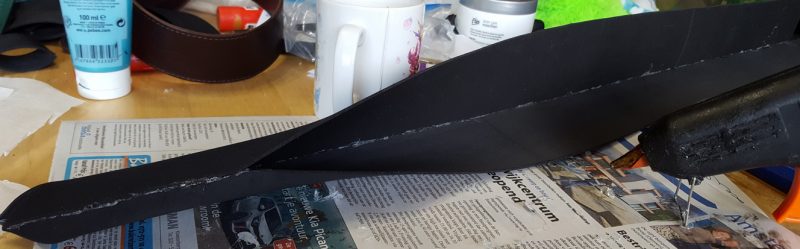
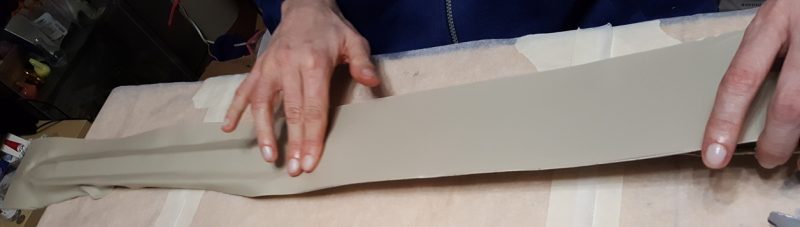 Starting from the tip, we heated the Thibra with a heat gun until it becomes soft and make it adhere to the foam. In order to avoid leaving marks and fingerprints we used some vaseline (petroleum jelly) on our hands. This also makes easier to smooth the surface.
 Once the first side was covered we cropped the excess of Thibra, leaving around 5-10mm extra on the edge.
 Same procedure for the other side…
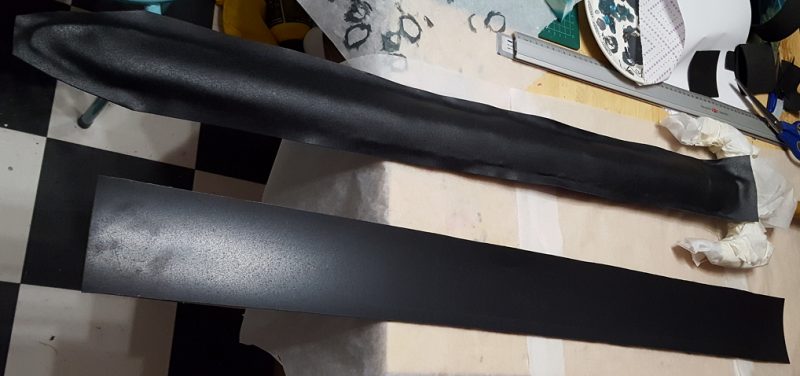
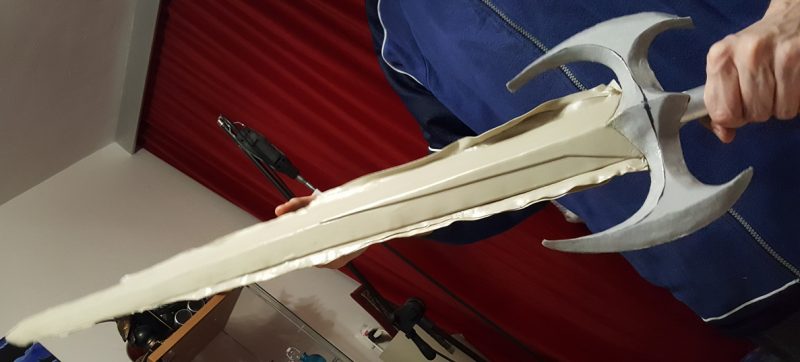 We pressed together the Thibra on the edges and made it stick together. The excess was cut out and the edge smoothed with a finger.
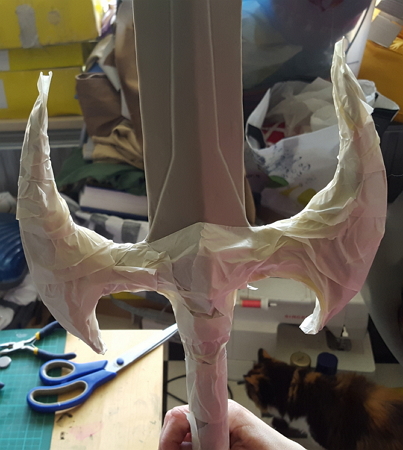
 After the blade was complete we passed to the guard. We initially protected the part of the part of the blade closer to the guard with baking paper and masking tape in order to avoid the Thibra from accidentally sticking to itself.
We trimmed the excess (picture on the left), then covered the other side (picture on the center) and finally smoothed everything out (picture on the right).
Making the Pommel
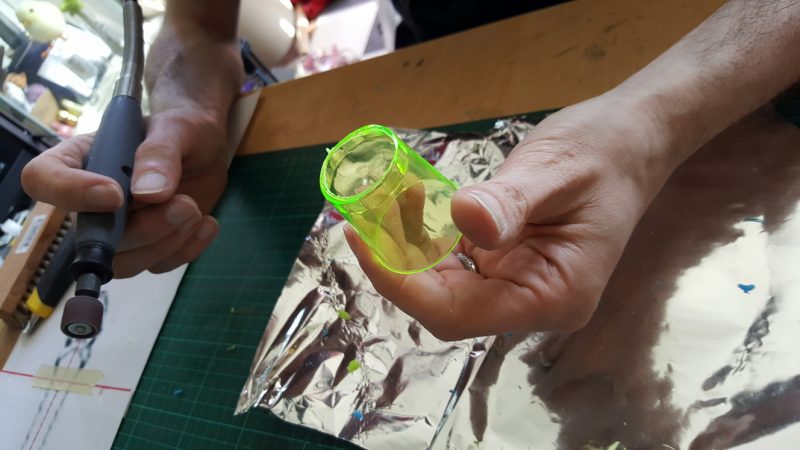
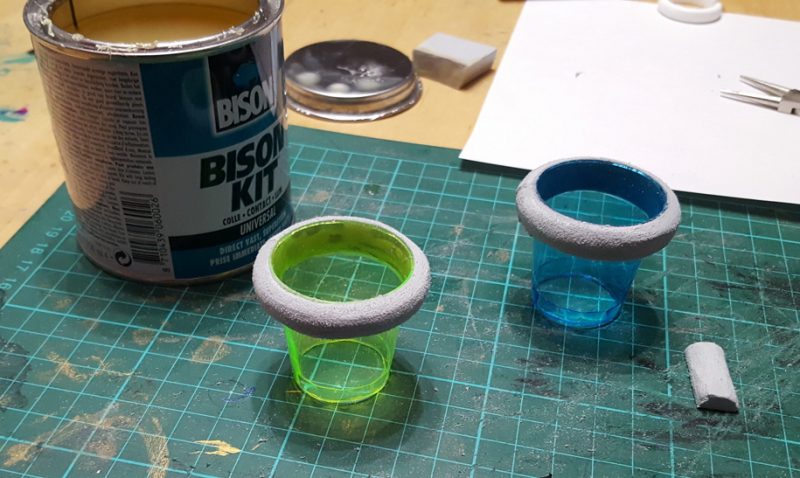
As base for the pommel we used 2 plastic shot glasses from which we removed the base with the Sanding Band on a Dremel. We shaped a strip of eva foam in semi circular shape with the Sanding Band and glued it to the rim of the glasses with contact glue.
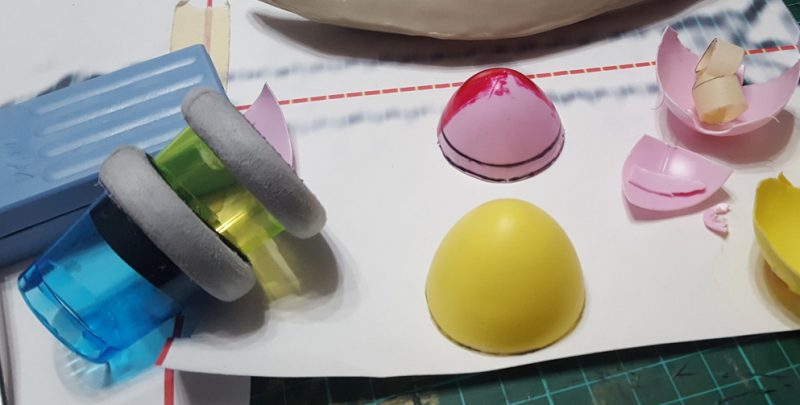
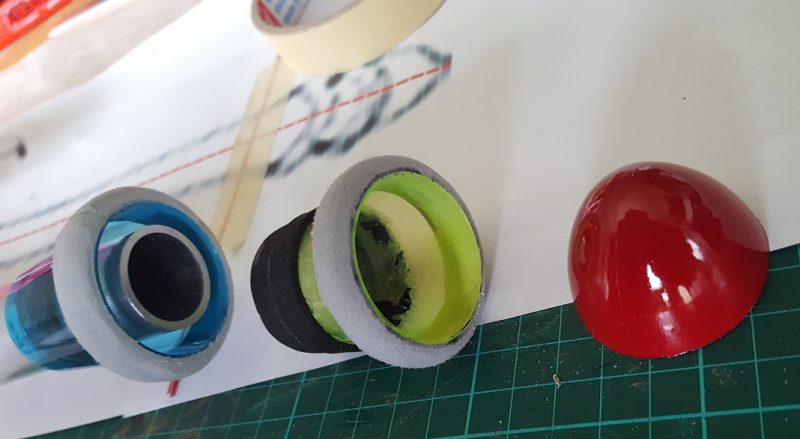
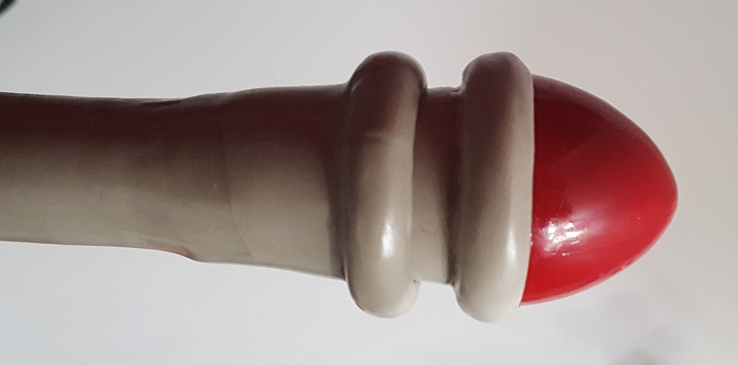
For the gemstone at the end of the pommel we used half of a plastic egg, found as an Easter decoration. It was cut using a hot wire styrofoam cutter. We put some black craft foam on the yellow glass in order to make it fit as a plug on the blue one as we want the pommel to be removable, because it will contain a LED to light up the gemstone (that in now already painted with red acrylic spray and nail polish as final transparent paint). There is some craft foam also inside the blue glass to get a larger contact surface with the grip and making it easier to glue it in the right position.
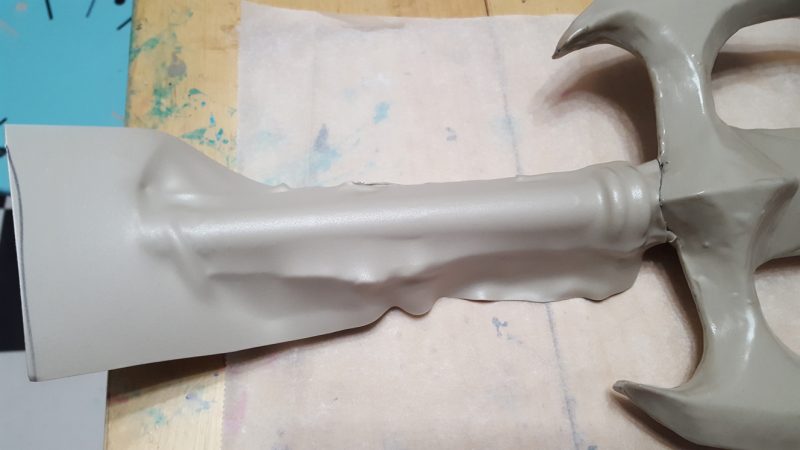
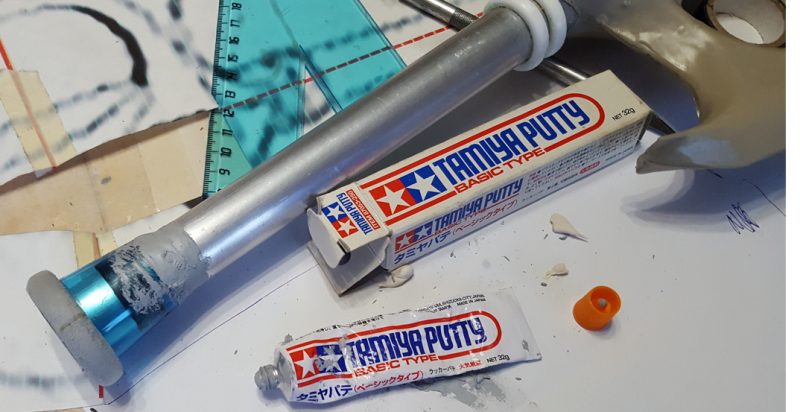 We glued the blue glass to the grip and applied some model putty and Wonderflex to make the transition smoother. Before that we also slipped in 2 plastic rings (that you can see on the opposite side of the grip) and fixed them in place with contact glue.
Applying Thibra the Grip and the Pommel
With the same procedure of the blade and the guard, we covered the grip as well with Thibra.
To remove the excess in the small spaces near the rings and guard we used a hot wire styrofoam cutter, then smoothed the surface.

We covered the second glass as well, making sure to leave the craft foam at the bottom uncovered. The picture on the right shows how the pieces of the pommel stick together. The top part can be plugged and unplugged.
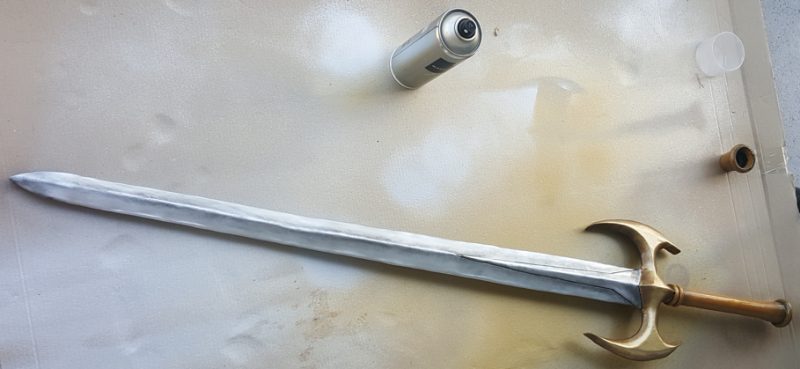
Painting the Sword
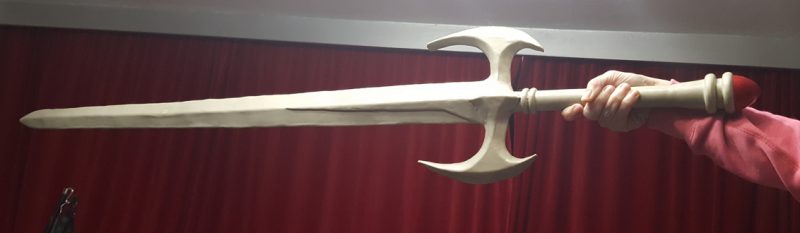 Here the complete sword, now it’s time to color it. First of all it’s better talk about Thibra, this is a really nice material, and its smoothness is great in particular when you come from Worbla where you have to give several layers of vinyl glue, gesso or flex bond, but this smoothness could be sometime also a bad thing.
So before to start to color, you need to remove all vasellina, as said Thibra is already pretty smooth and the vasellina makes it still smoother and this isn’t good for the painting.
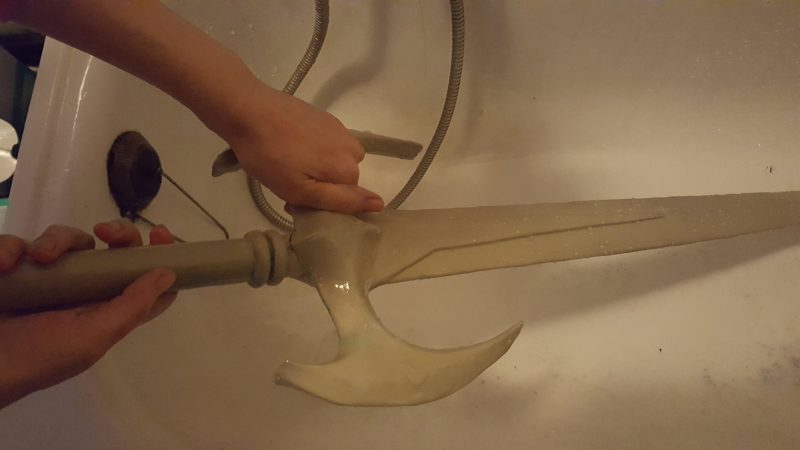 So we washed the sword with water and dish soap or shampoo, paying attention don’t use hot water, lukewarm water is OK, but not more of it.
We have also washed the sword several times, since the vasellina is pretty resistant and have some residual on the surface could compromise the painting.
 Which kind of color to use?
Well, here we could open a large debate, we saw that various people prefer use painting for brush(that in our opinion in The Netherlands where we live doesn’t make sense, since we have really horrible colors, that are really good for artistic purposes but awful for cosplay stuff, since they are transparent. In other country could be different. ), or acrylic spray color, easiest and quick to give, of course if you have an open place where to use it.
We’re between these two factions, we use both, since we think that both are useful to have a good work.
So for Zelgadis’s sword we used as base spray acrylic color and for the weathering the brush color.
As said previously Thibra is pretty smooth, It’s better to give a primer on it, we were stupid and we didn’t use it, so we had to color it twice.
Since we had to color the sword with 3 different colors, the guard gold, the grip ochre (we made it as in Slayers NEXT/TRY, our favorite series) and the blade silver.
Usually we cover the part using masking tape, but this time we had to pay attention to don’t push too much the tape on the surface to cover, since the smoothness of Thibra could help to detach the color from the part already colored. To be sure,in some pieces, we used a bit of newspaper under it.
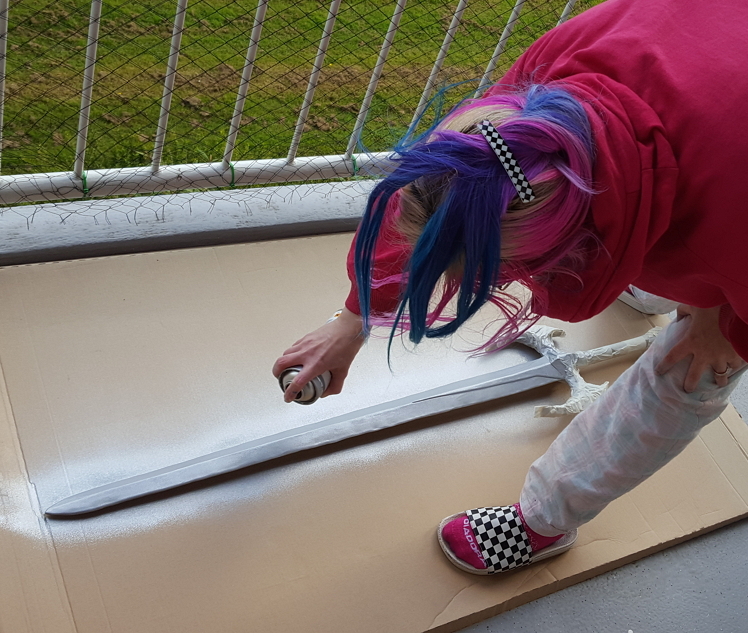 Here we’re giving the acrylic spray, we used Molotow color since they were matte, it’s better avoid really glossy colors, since they could detach while you use the sword.
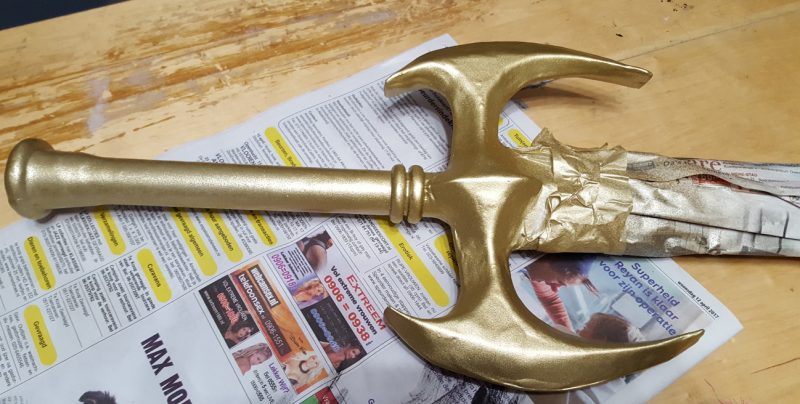
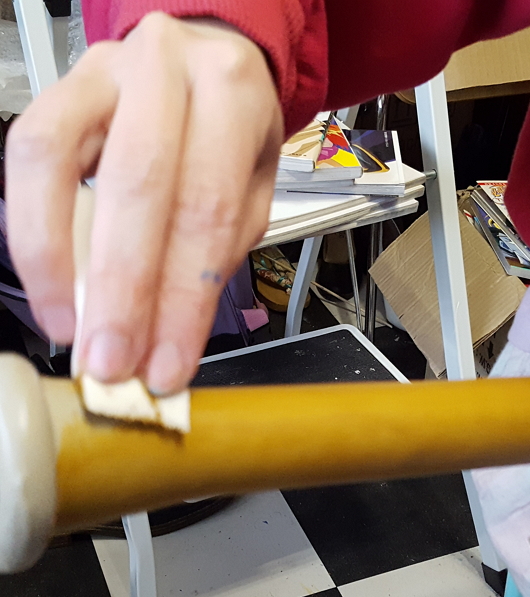
Since we needed as said of the grip painted with ochre color, but we didn’t have the acrylic spray, we gave on the gold a layer of acrylic for brush. For having a smoother color we use a make-up sponge to give it, picking lightly on the grip surface.
With the same technique we gave also the weathering, starting before with midtone colors going until dark colors. In the case of the grip we used Siena raw color and black. While for the guard we used dark ochre, Siena raw and black. About the blade we just used black.
After that we started to give the highlights, gold on the grip, light gold on the guard and light silver for the blade.
After this procedure we painted with a black marker and black paint the part where the various pieces were attached, such as under the grip rings, the triangle on the blade, etc… to have a more tridimensional effect.
 As last thing, after the painting we added around 10 layers of glossy clear spray paint, since we didn’t use the primer under the color, it could result a bit fragile.
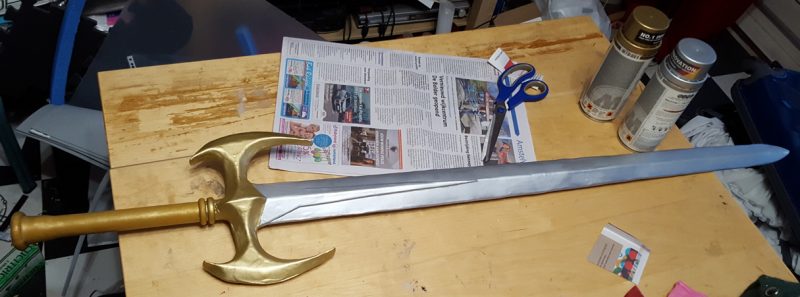
After that the sword painting was complete.
Adding the LED to the Pommel
We decided to add a LED to the pommel to add a nice effect in low light / night.
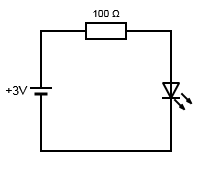
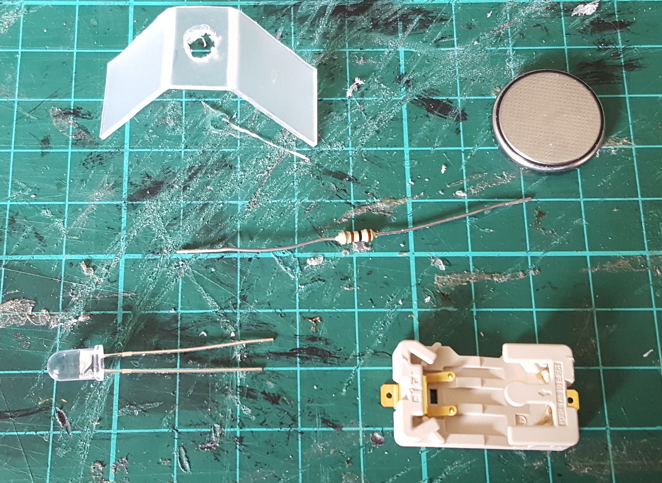
This is the circuit diagram, it includes:
- 1 x CR2032 3V Coin Battery
- 1 x Sewable CR2032 Battery Holder from Adafruit (we used this holder as it’s very easy to snap in and out the battery, so that you don’t need a switch, and it fits in the pipe we used as grip)
- A few centimeters of wire
- 1 x 5mm Red Clear LED (very bright) Forward voltage: 1.85V, Forward current: 20mA
- 1 x 100𝛺 Resistor as protection for the LED.
The theoretical value for the resistor would be R = ( Vs – Vf ) / I with Vs = power supply voltage, Vf = LED forward voltage and I the desired current. So in this case would be R = ( 3 – 2.2 ) / 0.020 = 40𝛺. We chose to use 100𝛺 as it was the closest value we had already available and the LED was still bright enough.
 We assembled and soldered the components …
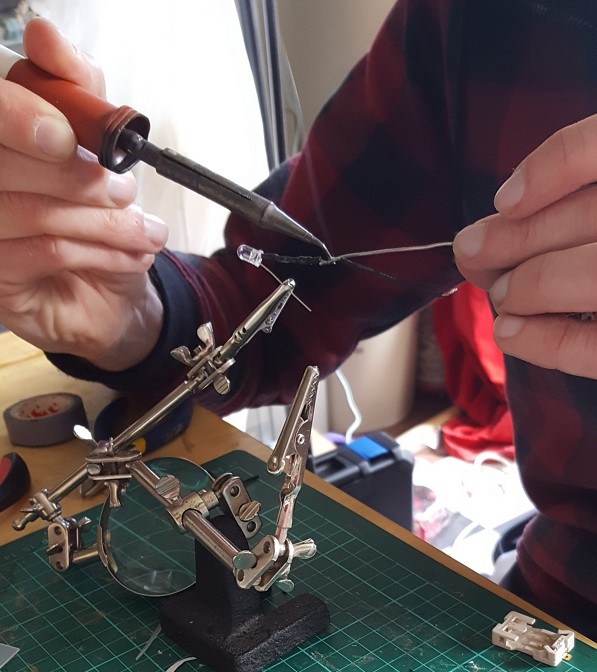

… and put some Heat Shrink to cover the contacts and add some protection. We used a burner (like the ones for Crème-Brûlée) but a heat gun can be used as well.
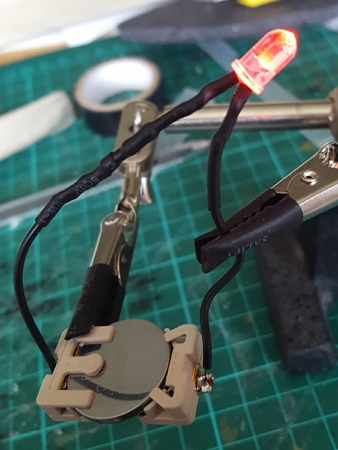
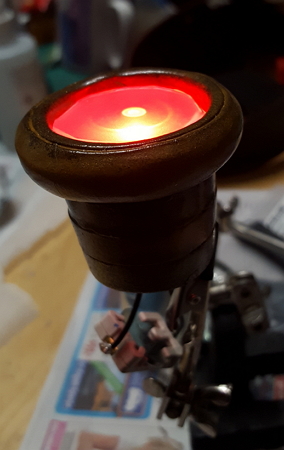
On the left you can see the finished circuit, just snap in the battery to turn it on (as in the picture) and remove it to turn it off. The light of the LED is very intense and directional, this mean it would project a dot in the middle of the half egg gemstone and not much light on the rest. So we added a mount made of matte transparent plastic (polypropene) that will act as a diffusor and make the light more even.
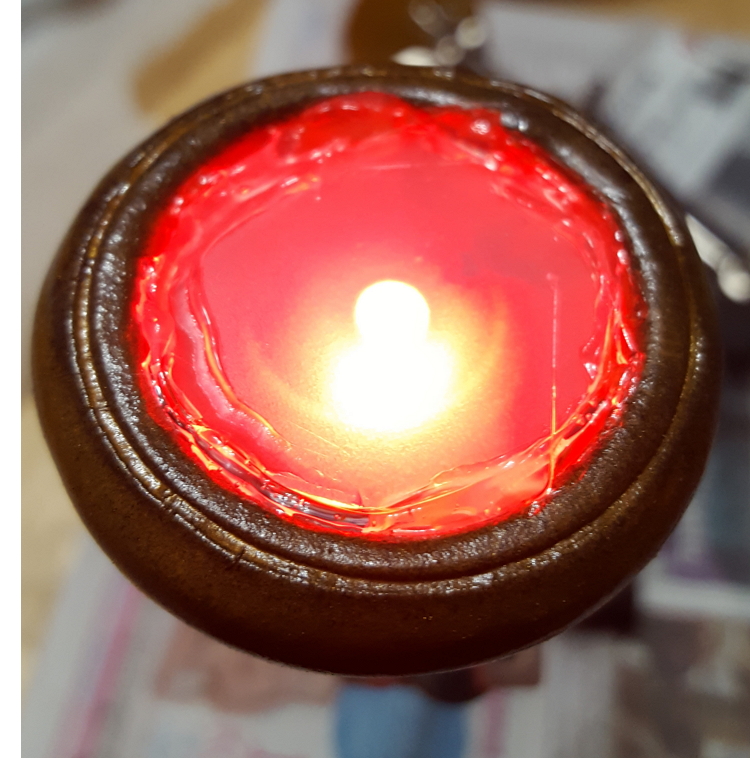
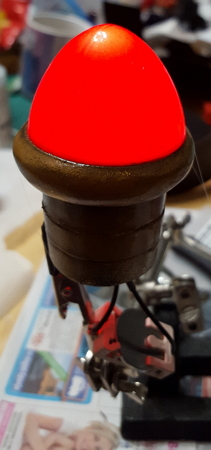
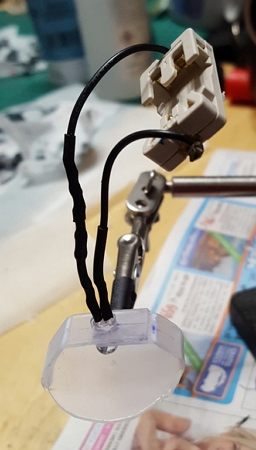
We slipped the battery holder through the removable part of the pommel leaving it hanging out from the smaller opening. The mount fits on the other end keeping everything in place and was then fixed with hot glue. On top of that the gemstone was glued with Gel Cyanoacrylate (CA) glue. The light is now smoothly diffused and the pommel can slot in the grip with the battery slide inside the aluminium pipe.
Making the Scabbard
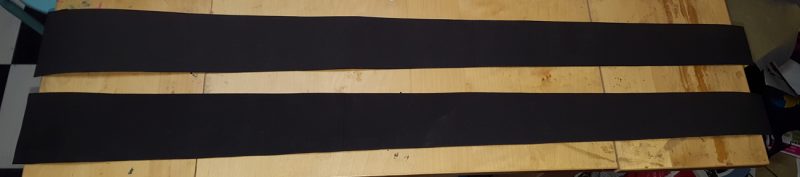 For the scabbard we started by cutting 2 shapes in black craft foam, slightly larger than the blade of the sword.
We cut a triangle out on the upper side to match the shape of the guard and started attaching the sides with hot glue, so that the 2 pieces of craft foam stay perpendicular. Same for the other side. We also added an additional layer of foam, few centimeters high, on the outside of the opening where the blade enters (not pictured here).
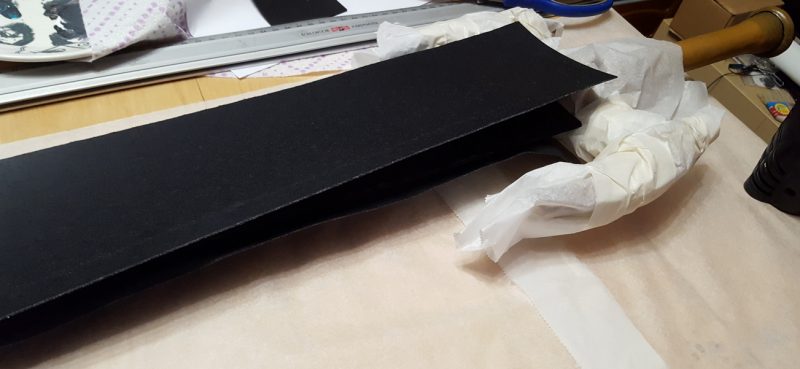
We slipped the foam scabbard on the blade of the sword, to make it keep the right volume, and covered the guard with baking paper and masking tape to avoid that the air from the heat gun could damage it. Then we started applying Worbla’s Black Art first on one side and then on the other.
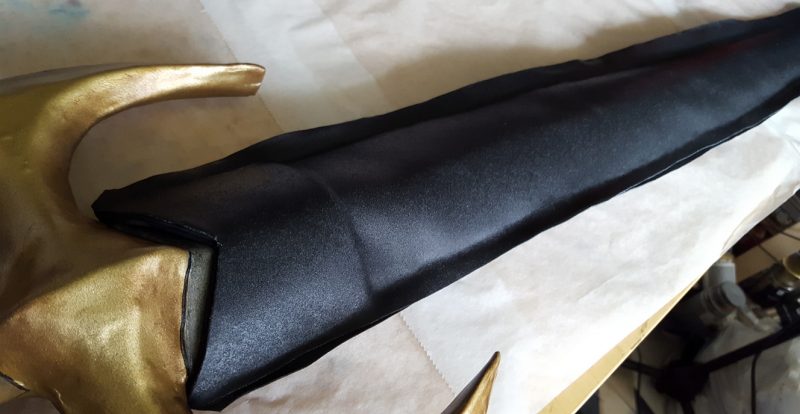
We closed the edges of the worbla pieces together and cropped the excess.
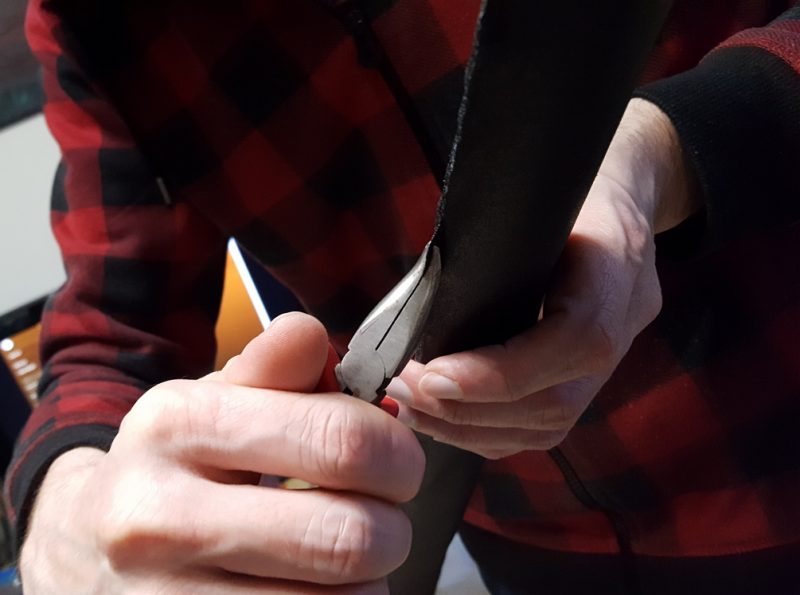 The border was still rough so we heated it up and pinched it with bent nose pliers. In this way we were able to obtain an uniform border line. The excess worbla was very thin and easy to cut out with electrician scissors. Since the scabbard was already black we just finished it quickly with Flexbond, black acrylic spray paint and glossy transparent spray paint in this order.
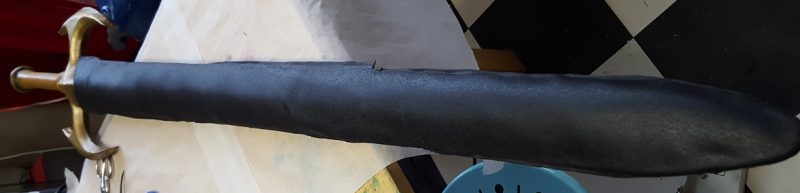
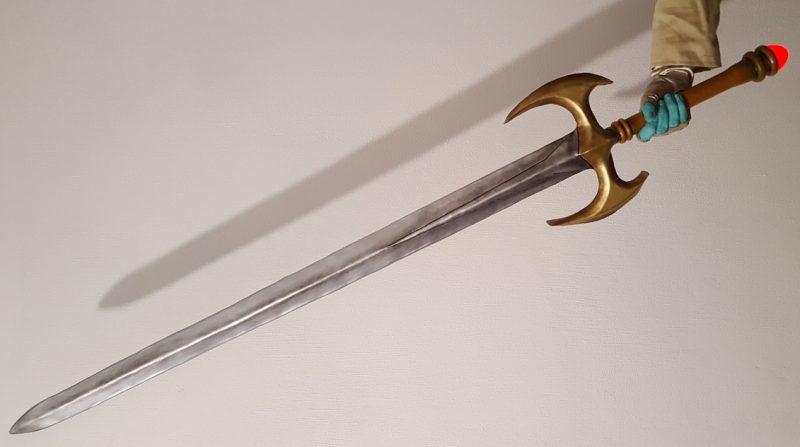
The sword is complete
Here a few pictures of the finished sword and the complete costume worn by Hoshi:
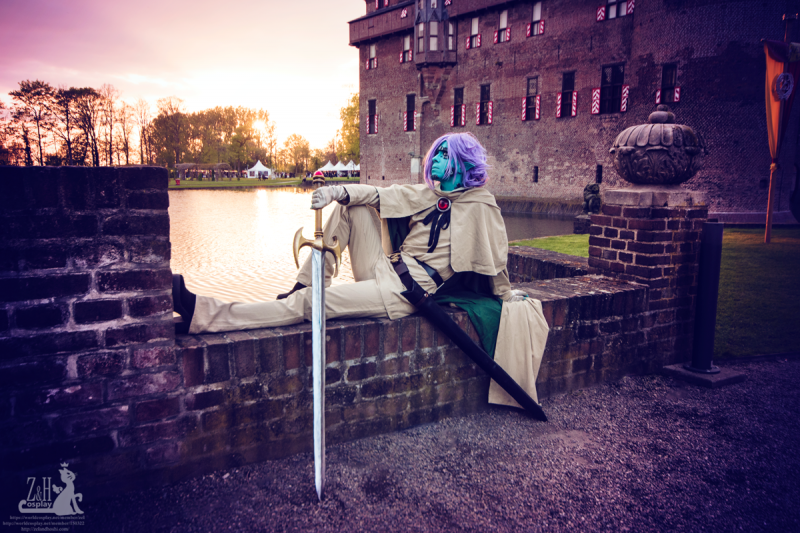
Zelgadis Greywords
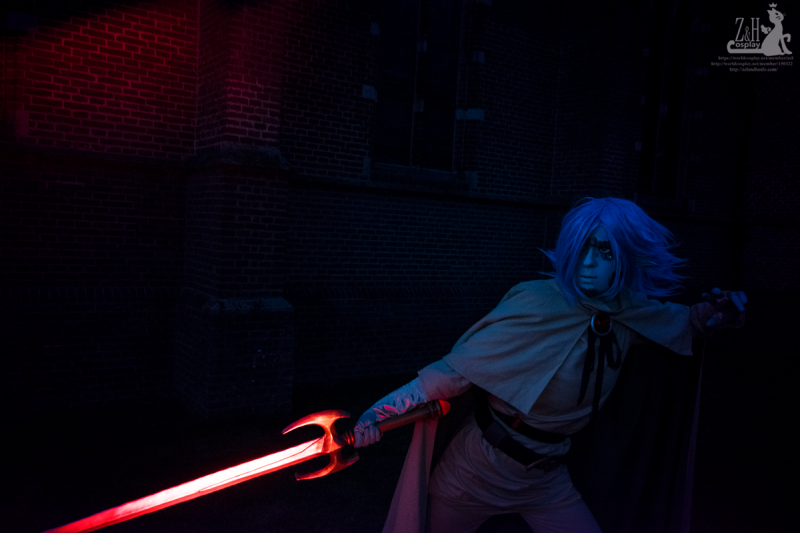
Zelgadis Greywords
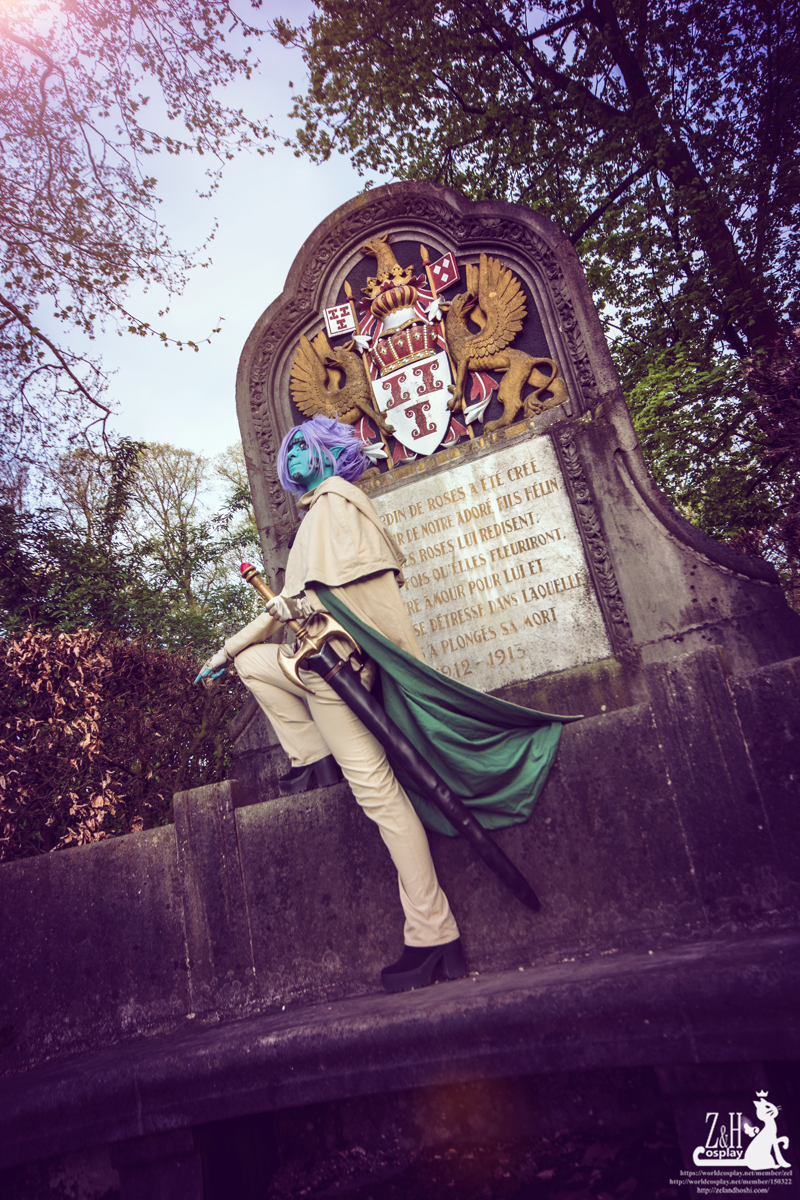
Zelgadis Greywords
You can see more pictures of this costume in the gallery: Zelgadis Greywords from Slayers